What’s Renvatek and this core about?
On this month’s very first day, I bought two .com domains: renvatek.com (canonical) and renvatech.com (redirect). Pretty sure the name “Renvatek” is pronounceable by almost everyone (hopefully). From now on, the entity “Renvatek” will serve as my in-house computational-cores designing powerhouse!
And the good news is that I have completed the RTL development and the verification for its very first core, the Renvatek Quartz-1! Heads up, this post is going to be about verification and compliance details of this core entirely.
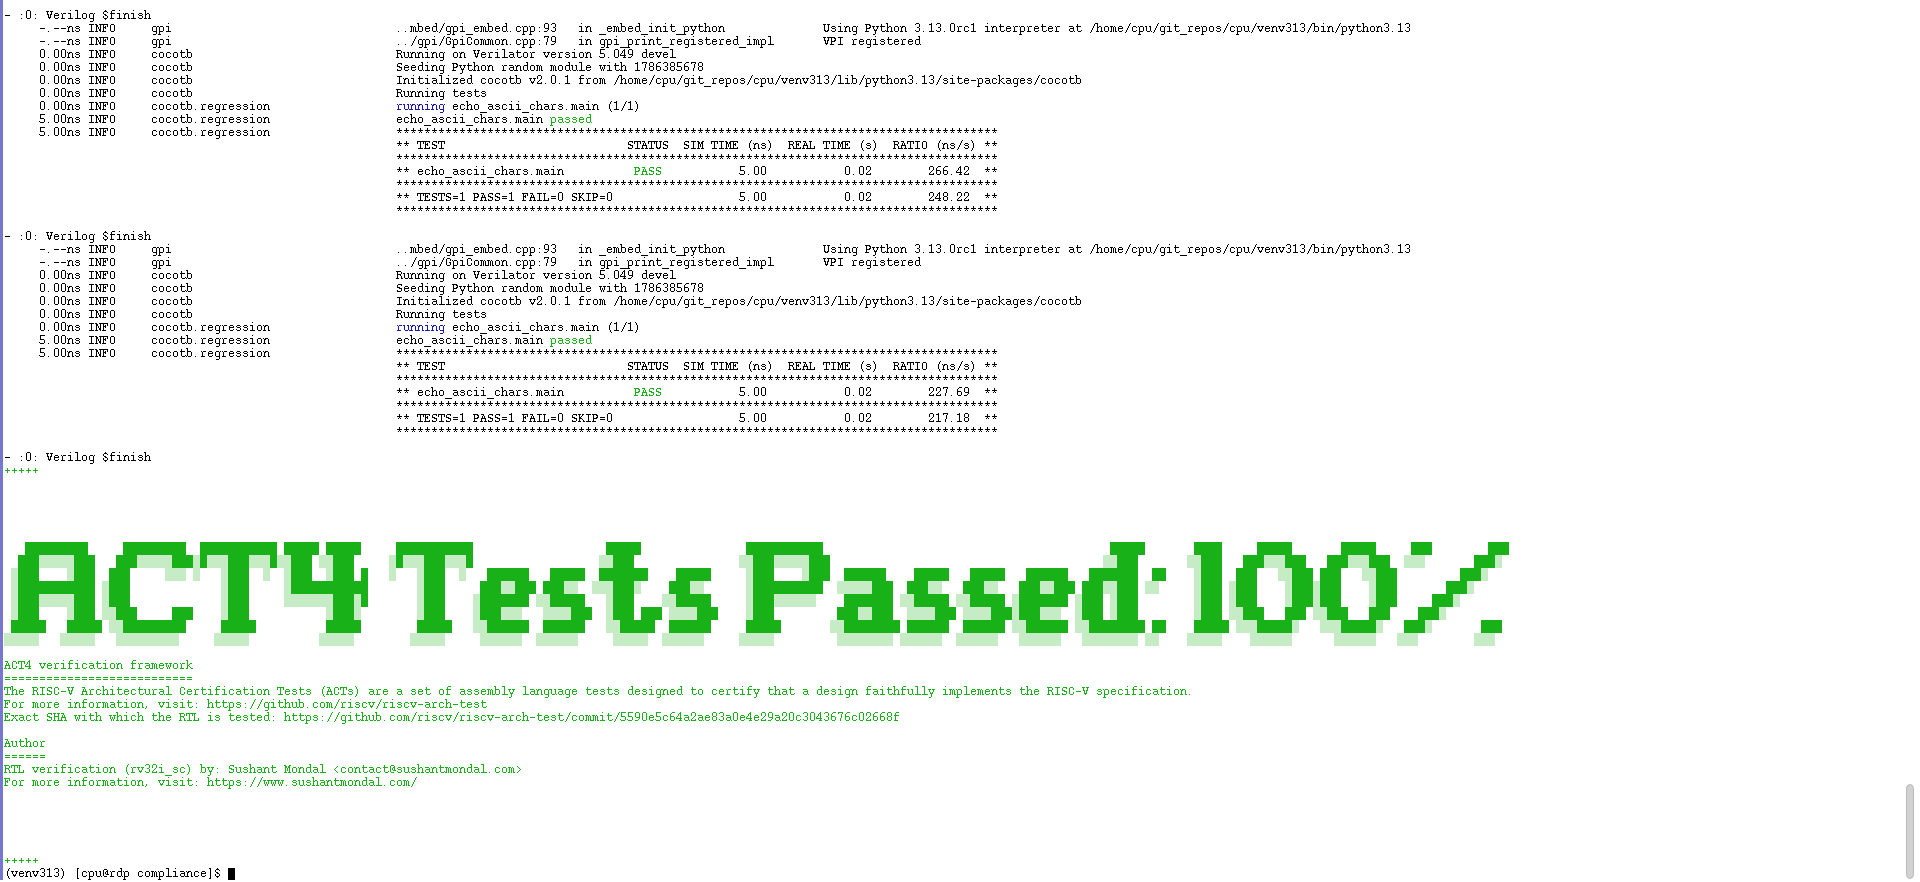
Renvatek Quartz-1 (QE001001RV32IN0), my single-cycle RV32I core, just passed all 39 RISC-V ACT4 architectural compliance tests. 100% pass rate on the very first shot.
Here’s what that took, and what actually went wrong along the way.
What ACT4 tests
ACT4 is the official RISC-V Architectural Certification Test framework, maintained by the RISC-V Foundation at riscv/riscv-arch-test. For the RV32I base ISA, there are 39 self-checking test programs, one per instruction or instruction group, covering the entire base instruction set: arithmetic, branches, jumps, loads, stores, shifts, and comparisons.
Each test’s expected result is pre-computed by Sail, the Foundation’s reference model, and baked into the ELF at build time. So no live reference model is running alongside my CPU during simulation. My hardware computes a result, checks it against what Sail already decided the answer should be, and either matches or fails right there.
I ran this against riscv-arch-test commit 5590e5c64a2ae83a0e4e29a20c3043676c02668f.
Why this matters
Architectural compliance means Quartz-1 implements RV32I as the spec says it should, instruction by instruction, and is checked against the same reference model the RISC-V Foundation uses. That’s the baseline any RISC-V core needs before anyone should trust it with real work, and it matters even more for something aimed at defense-grade, radiation-tolerant silicon (future to-do).
The messy part
Getting the core to run was one thing. Getting an actual verification flow around it was a different problem.
I started by wiring the core into Verilator and Cocotb. The first test was deliberately simple: echo_ascii_chars (harnessing the virtual printer @ a print port register (IO): RVMODEL_IO_WRITE_STR macro @ rvmodel_macros.h). Verilator was able to build the whole rv32i_sc design and cocotb started correctly. The test itself passed, but there was already a warning sitting in the output:
%Warning: imem_program.bin:0: $readmem file not foundThe test still reported PASS, which made the result a little misleading. At that point I was not yet running an architecture test through the instruction memory. I had a simulator that worked, but I did not yet have a useful compliance flow.
The next problem was getting the RISC-V Architecture Tests framework running. I ended up dealing with the framework’s Python environment, uv, the generated test infrastructure, the Unified Database tooling (udb), and the different branches of riscv-arch-test. There were several attempts at this. At one point I had switched between main, act4 and Jordan Carlin‘s import_module_refactor branch while trying to get the new test-generation code working. The testgen package itself was failing during module discovery because of a circular import involving vector_helpers.py and vv_type.py. I flagged this issue @ #2061, which was fixed by Carlin (PR #2065) and merged to upstream.
Eventually the framework got far enough to generate the test infrastructure. The output showed 177 test suites being generated, one DUT configuration being prepared, and 195 build targets already up to date. That was the first point where the compliance framework was actually doing something substantial with my core instead of just compiling the simulator.
Then I had to figure out how to get the generated ELF files into my very specific memory model. The architecture tests produce ELF binaries, while my core expects its instruction memory in a binary format that can be consumed by $readmem. I wrote a runner that finds every generated ELF, extracts the relevant .text sections with riscv32-unknown-elf-objcopy, converts the resulting bytes into the bit ordering expected by my instruction memory, and writes them to imem_program.bin. I also extract .rodata, .data and .bss into a Verilog-format data-memory initialization file. Each test gets its own temporary directory so that the generated memory files do not collide with one another. Refs: link.ld
That runner had its own problems.
Because the scripts use set -euo pipefail, an unset PYTHONPATH immediately killed the run with:
PYTHONPATH: unbound variableAfter fixing that, the simulator started launching, but cocotb could not load libpython3.13.so. The simulator would start, print the cocotb/VPI messages, and then finish, but the actual Python test environment could not be loaded.
There were also smaller environment problems along the way. Running the compliance script before activating the correct environment produced cocotb-config: No such file or directory. The Python environment being used by the shell and the .venv expected by riscv-arch-test also kept disagreeing, which showed up repeatedly as VIRTUAL_ENV warnings. I had to keep untangling whether a failure was coming from my RTL, cocotb, Verilator, the architecture-test framework, Python, or simply the shell environment.
That is probably the least glamorous part of building a CPU. At this stage, very little of the debugging was actually about the datapath. I was debugging the machinery around the datapath so that I could eventually trust the tests being run against it.
The useful part is that the pieces are now separated. The architecture-test framework generates the tests, the ELF files are converted into the memory format my core expects, the runner launches the compiled Verilator model, and cocotb provides the interface between the test environment and the RTL. That gives me a path from an architectural test case all the way down to instructions actually being executed by my core.
A personal note
It’s been almost six months of RTL work (started late February this year), and this is the first result that felt real. Not “it compiled.” Not “it ran once and looked okay.” A test suite I didn’t write, checked against a reference model I don’t control, and every single case passed. The confusion at the start wasn’t wasted time. Having to trace the framework by hand is exactly what made the pass mean something.
Next up are the pipelined variants, and eventually taking this from architectural correctness to radiation-hardened silicon. For today, though, I’m just sitting with this one :-).
Video proof
Do you also want to test this core by yourself?
Third-party verification is the best thing I could ask for. For this, you have to clone the verification repository first.
Then execute the following commands to verify this core using its simulated binary version:
cd compliance
chmod +x main.sh
./main.sh
End note
Quartz-1 is my first CPU core, and getting it from RTL to a point where someone else can actually run the verification suite was a big part of the process. There were plenty of rough edges along the way, especially around the verification setup, but getting the ACT4 tests passing and packaging the verification environment into something reproducible was a good milestone.
This is only the beginning for Renvatek and for the cores that come after Quartz-1.
Thanks for taking the time to read through the process.